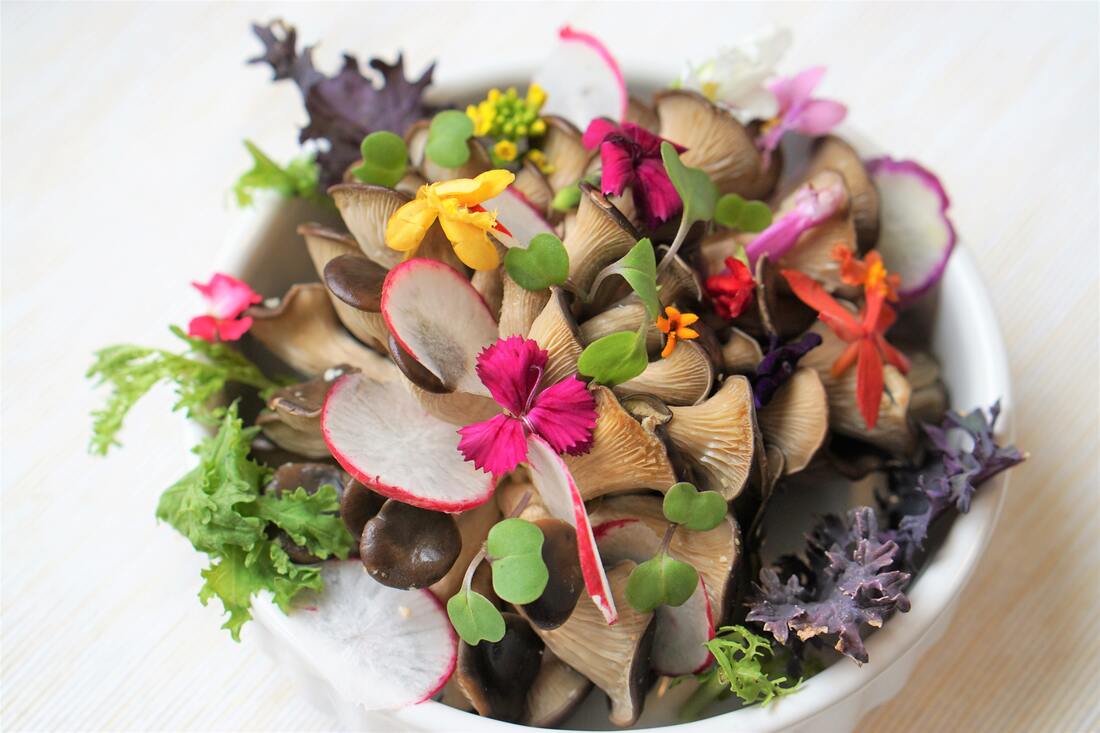
 So far, we've learned how to grow our own herbs for a beautiful dressing. Then, we learned how to grow lettuce from seed. Easy peasy! Now, it's time to take your homegrown salad from plain to GORGEOUS. Growing flowers is a passion of mine, and edible flowers are extra special because they are equally beautiful and useful. When you add edible flowers (usually just the petals) to your salad, you are elevating your meal to a whole other level. Oh, and your dinner guests will think you are tres chic. Today I'm sharing my top five easy-to-grow edible flowers. These flowers are easy to access either by seed or from your local garden center. IMPORTANT NOTE: Please know that not ALL flowers are edible. Carefully research before you eat flowers that are not on this list, as some can be quite poisonous. For example, sweet peas are a beautiful cut flower, but all parts of that plant are incredibly toxic. Please have fun, but be careful here. ONE: NASTURTIUMS 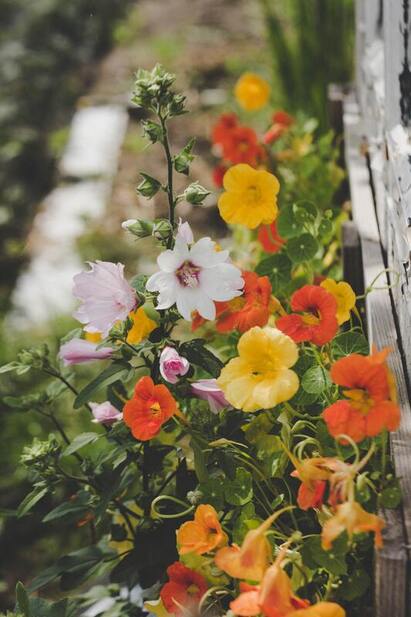 Nasturtiums are quite possibly my favorite annual edible flower. They are so easy to tuck into empty spots in your kitchen garden or edible landscape. Their beautiful, lily pad-like leaves have a lovely bold texture, and their flowers come in so many different colors. I'm sure you'll find a variety that calls to you. Nasturtiums are not fussy about good soil and will reseed themselves readily if you let them. Who doesn't love free plants? Growing Note: If you are starting nasturtiums from seed, soak the seeds for 12 hours before planting. Pre-soaking helps to shorten germination time. If you are starting them inside, when it is time to plant them out (usually when they have 6-8 true leaves), take care not to disturb their roots. They do not like to have their roots jostled or pulled. Pop them out of their container and directly into the soil in a full sun location. Height: 1-2' Flavor: Peppery, like arugula Favorite Varieties: Ladybird Rose, Gleam Salmon, Aloha Mix, Vanilla Berry TWO: VIOLAS & PANSIES 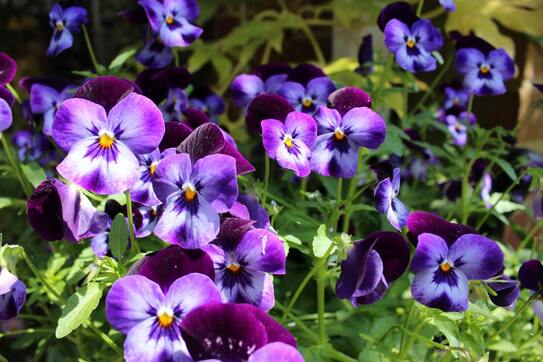 These sweet little flowers can be added whole or as petals to salads or sugared for a delicate decoration on desserts. These are cold hardy plants and grow all winter in my Zone 8b garden. They don't love the heat, though, and will likely die back in the summer. But they reseed easily, so you'll see volunteer baby plants popping up when the weather cools off in Fall. Growing Note: If starting indoors, the seeds require darkness to germinate, so cover lightly with soil. Height: 6-12" Flavor: delicately floral Favorite Varieties: Antique Shades Pansy, Gem Pink Antique Viola, Dynamite Lavender Pansy THREE: CALENDULA 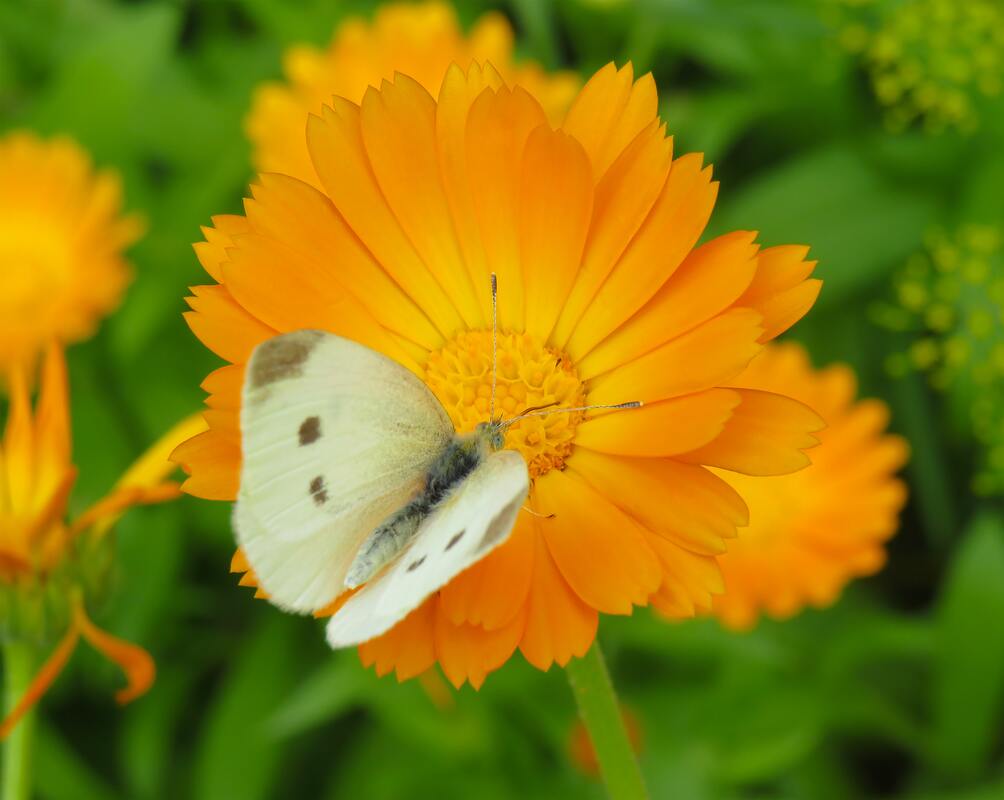 This plant is the workhorse of the edible garden. They bloom almost year-round for me, reseed and volunteer readily, and are a pollinator magnet. Thankfully, we have so many beautiful new varieties than just the original orange type. I pull the petals off the flower and sprinkle them on my salads for a pop of bright color. Use your calendula flowers to make nourishing skin healing salves too. Height: 1-2' Flavor: can be spicy, tangy, peppery (reminiscent of saffron) Favorite Varieties: Ivory Princess, Bronze Beauty, Greenheart Orange FOUR: BORAGE  Borage is a best friend of bees and other pollinators. They have a wildflower look about them with pretty, star-shaped blue flowers that can be added whole to your dish. They will seed themselves around quite a bit but are easy to dig up and relocate if needed Height: 1.5 - 2.5' Flavor: Reminiscent of cucumber Favorite Varieties: I only know of one type of borage. It is blue-flowered with fuzzy leaves and stems. FIVE: ROSES 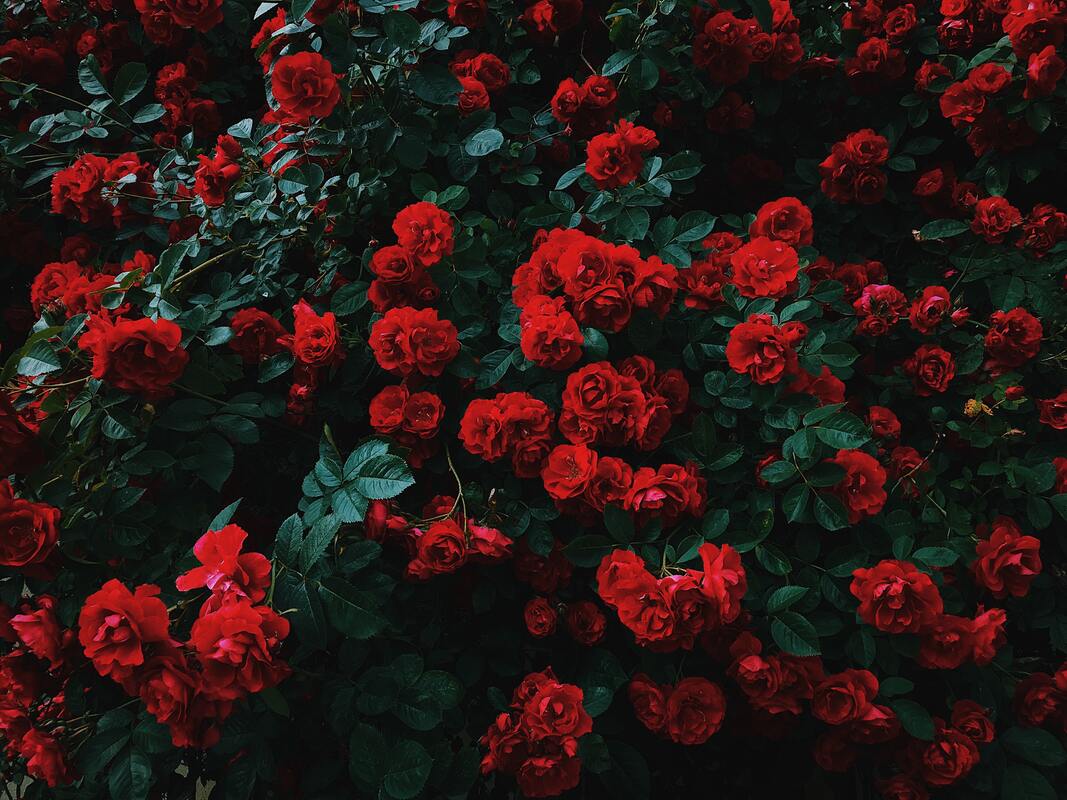 Roses are, by far, one of my favorite shrubs in the garden. I've been collecting them for years, especially the fragrant ones. I prefer the smaller, aromatic English varieties for my edible flower dishes since the petals tend to be smaller. Don't worry, you don't have to eat the whole flower head! Again, pull the petals off the flower heads and sprinkle them into your salad bowl and mix. The white, pink, coral, or red-colored petals will stand out. I have roses that smell like melon or grapefruit, so those tend to be the ones I use in salads because the scent isn't overwhelmingly "rosey." Height: Varies; 2' - 5' Flavor: delicately floral and slightly sweet Favorite Varieties: Scented varieties like Crown Princess Margareta or Lady Emma Hamilton, or bicolored petals like my Bulls Eye Rose HONORABLE MENTIONS  Here are some other edible flowers that didn't make my top 5, but are still very good:
USING EDIBLE FLOWERS IN YOUR GARDEN DESIGN 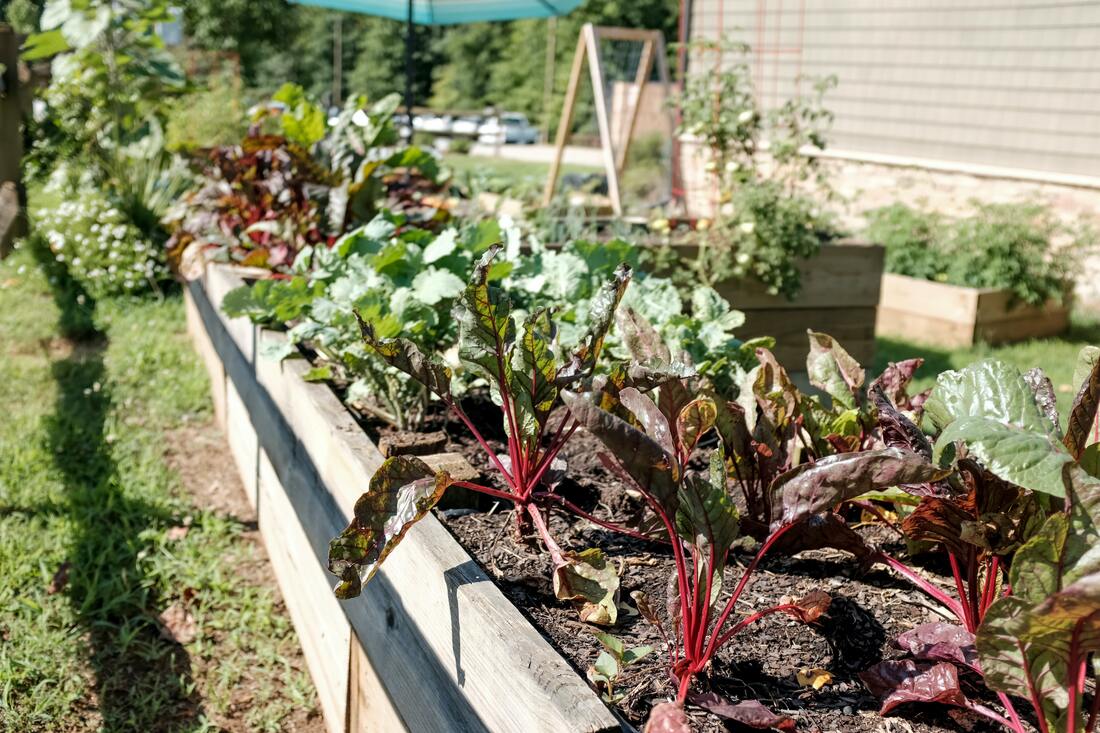 When I'm designing a kitchen garden or integrated edible garden for myself or a client, I rely heavily on edible flowers to fill in the gaps between other plants. Tucking a viola between a couple of broccoli plants looks sweet and adds that pop of color that our kitchen gardens are usually missing. I also love planting nasturtiums at the edge of raised beds and letting them spill over the side for a full, billowy look. Try tucking any of the annual edible plants I mentioned above (basically everything except for the rose) into your kitchen garden and notice how many more pollinators visit. Mostly, I hope you have fun with it! I know it can seem a little weird to eat flower petals at first, but the flavor is usually mild, and the unique color they add to a dish is worth it. I hope you give it a try! It has been a pleasure to guest post on the Tri For Real Blog for the past month! I hope that these posts have shown you just how easy it is to grow food in your backyard, or front yard, or balcony! I'd love to know that there are more gardeners out in the world eating beautiful, flavorful, and nutrient-rich food. Show me those gorgeous salads! Tag me @revivalgardenco if you post the pictures to Instagram. In the meantime, happy gardening! Sara Cory is a garden designer, garden coach, and founder of Revival Garden Company. She is dedicated to helping new and established gardeners create edible and cut-flower gardens that are both beautiful and productive. 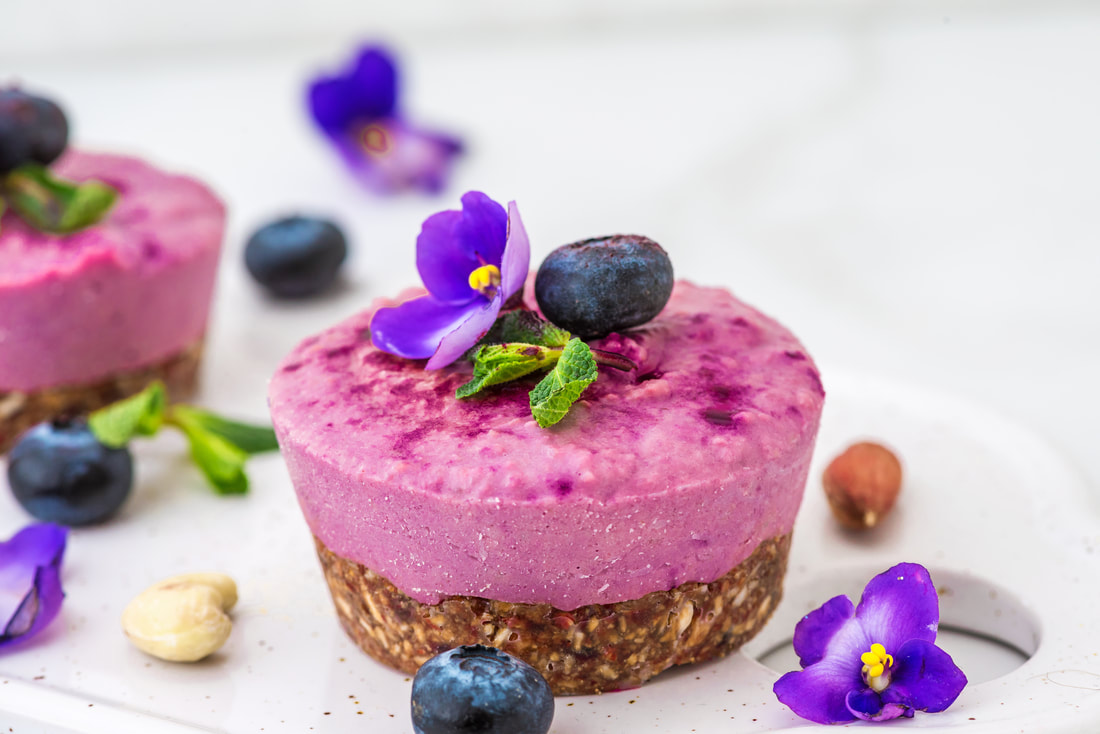 Because every good flower needs a happy plate of food to sit on... Keto Berry "Cream Cheese" Bites Recipe by: Tiana Rockwell, FNTP Crust Ingredients:
⬢ 1 Cup Halved Pecans ⬢ 2 Tbsp. Coconut Flour ⬢ 2 Tbsp. granulated Swerve ⬢ 2 1/2 Tbsp. Refined Coconut Oil, melted ⬢ 1 Tbsp Creamy Almond Butter or Cashew Butter ⬢ 1/2 tsp. Pure Vanilla ⬢ large pinch Sea Salt Berry "Cream Cheese" Filling Ingredients: ⬢ 8 ounces cashew cream cheese, softened ⬢ 3/4 cup blueberries, raspberries, or other low sugar berry of choice ⬢ 6 tablespoons salted butter or ghee, softened ⬢ 1/4 cup confectioners swerve ⬢ 1 teaspoons vanilla extract Directions: 1. In a food processor, process the pecans until they are crumbly. Do not over process. You do not want pecan butter! 2. Add the remaining crust ingredients and process until combined. 3. Spoon the mixture into 12 silicon muffin cups and press the crust evenly into the bottom. 4. Place in the freezer while you make the filling. 5. Meanwhile, place the berries in a blender and pulse until pureed. 6. In a large bowl, combine the berry puree, swerve, and vanilla and stir until mixed well. 7. Add the softened cashew cheese and butter to the berry puree. With a hand mixer, mix until smooth and no chunks of butter or cream cheese remain. 8. Remove the crusts from the freezer. Using a spoon, top each crust with a layer of berry "cream cheese" filling. 9. Optional, but pretty awesome- top each dessert with an edible flower (pansy's are great for this!) 10. Freeze the desserts until hard, approximately 2 hours.
0 Comments
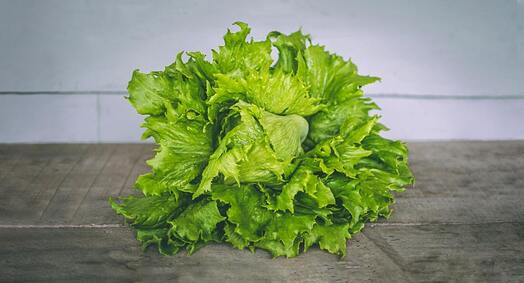
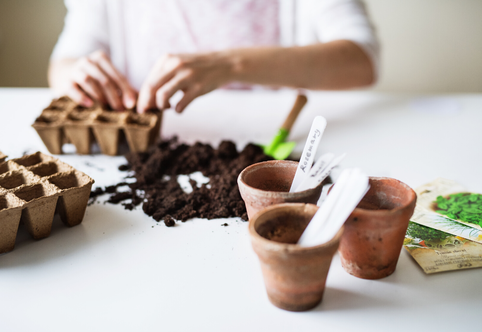
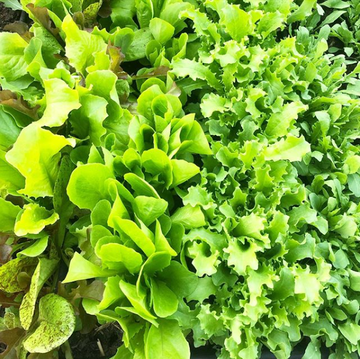 Today's post is from garden coach, Sara, from Revival Garden Co.My first experience growing lettuce was during a stint when I lived on an organic farm. We had a sizable patch with mixed varieties, including some non-lettuce plants like bok choy and arugula. In the cool of the morning, I'd visit the garden, a hot cup of coffee in hand, to harvest fresh lettuce greens for my lunchtime salad. Fast forward to today, my lettuce harvesting habits haven't changed much. However, I have developed a method to ensure we always have enough lettuce for our almost daily salads. The process of planting and replanting certain crops in the garden is called succession planting. Succession planting will take your gardening productivity to the next level, and it's a lot more simple than you think! Gardeners and farmers usually succession plant the crops that have a short lifespan, making lettuce an excellent candidate! In this method of succession planting, you will continuously work within three planting zones. I'll give you some ideas for how you can grow your lettuce using this method, but the sky's the limit here! Here’s what succession planting would look like in your garden so that you can get an idea of what it’s all about: 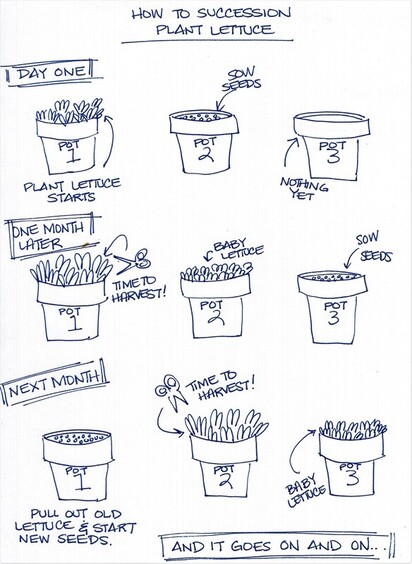 Start with transplants, if you want, to get a jump start. The same day you plant your lettuce starts, sow your first round of seeds. A month later, sow your next patch of lettuce seeds and harvest leaves from your lettuce starts for your first home-grown salad. A month after that, your first lettuce plants are probably getting a little bitter and old. Pull them out, replenish your soil if needed, and sow another round of seeds in the same spot where your lettuce plants used to be. By this time, your second patch of lettuce, where you started your first round of seeds should be ready to harvest! Do you see where this is going? If you follow the method, you will always have a patch of lettuce that you are harvesting from, one that is getting ready for harvest, and one that is seeded and germinating. Succession planting in this way is how you ensure you always have lettuce in the garden and it is an essential step toward creating a garden that is not just a place of feast or famine, but a constant supply of beautiful food.  GETTING STARTED What you'll need for this project:
 Directions Step 1: Prepare Your Soil If you are planting into pots, fill them 2/3 full of potting soil and 1/3 with compost. Add your slow-release fertilizer as prescribed by the manufacturer. Mix well. Step 2: Plant your transplants Now you'll start your "first succession." Since these plants are usually 3-4 weeks old when you buy them, they are giving you a jump start toward an earlier first salad. Plant your “lettuce starts” 4 inches apart if you can.
 TIP: Your soil surface must remain damp while your seeds are germinating (usually 3-10 days depending on the temperature). Once you see some green growth from your seedlings, you can ease up a little bit. In the heat of the summer, it's best to sow your seeds in the shade and water at least twice a day. Step 4: Mark your calendar for one month from the day you planted your lettuce starts and started your first round of seeds. That is when you will plant your next succession of lettuce. You can also take your first cuttings from your lettuce starts!
TIP: I love the cut-and-come-again method for lettuce. It lets you plant closer together and gives you multiple harvests from one patch of lettuce. The technique is easy! You can either cut or pull lettuce leaves from the outside of each plant. Be sure to leave at least four leaves on each plant. Or you can take some kitchen shears and cut the leaves about 1" above the soil level. In a few days, you will begin to see new growth coming from the center of each plant. Harvesting leaf-by-leaf takes more time but leaves the plants looking prettier. The shearing method is much faster but doesn't leave your plants looking very pretty. Either way works equally well. You will usually get 2-3 harvests from each planting before they start tasting too bitter. At that point, you should remove them (see Step 5). 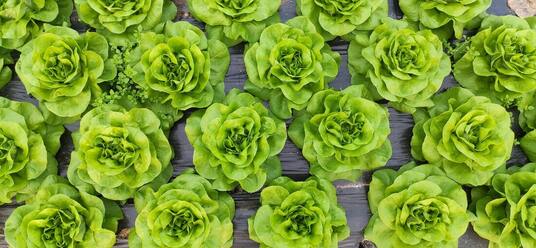 Step 5: Two months after you've started, it's time to pull out your old lettuce plants (i.e., the ones you bought as starts or transplants). In their place, start another round of seeds using the method in Step 3. Begin harvesting lettuce off your second patch, the one you seeded at the beginning of this project. It might seem a little complicated at first, but once you get the hang of the flow, succession planting is awesome! I have a recurring reminder on my phone that reminds me to start my next round of lettuce every month. It's a simple step that helps me remember those tiny chores in the garden that make a significant impact on my diet. So, are you going to give this a try? I hope you do! Be sure to tag me @revivalgardenco on Instagram when you do so that I can cheer you on. Sara Cory is a garden designer, garden coach, and founder of How Revival Garden Company. She is dedicated to helping new and established gardeners create edible and cut-flower gardens that are both beautiful and productive. 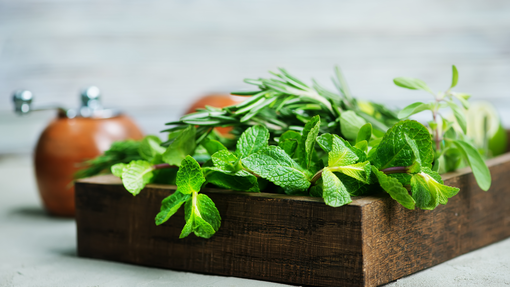 Today's post is from garden coach, Sara, from Revival Garden Co.If you have Tiana as your nutritionist as I do, you know a big part of creating a menu for the week is finding any way to make your daily 8-10 cups of veggie servings more interesting. And herbs are THE BEST way to do that. I can roast a huge plate of veggies and then use my homegrown herbs to change the flavor profile to be any number of ethnic cuisines. Plus, nothing feels quite so luxurious as walking out to your back door to snip sprigs of fresh herbs from your herb garden. Tiana asked me to come here to teach you how to grow herbs that are typically more expensive and not as easy to store in the fridge for a week. I don't even want to think of how much cilantro and basil alone I have let wilt in my fridge before using it. I'm going to guess it's in the range of hundreds of dollars worth and drives my husband insane. Oops! The very first one that came to mind is our beloved basil. Few things make me cringe more than having to go to the grocery store to buy 2 slightly wilted sprigs of basil packed in a tiny plastic container for $5! Don't even get me started about the packaging of some herbs, let alone the cost. Once you how to grow basil and you experience just how easy and prolific is it, you will never want to spend money on that sad little container of basil leaves again. 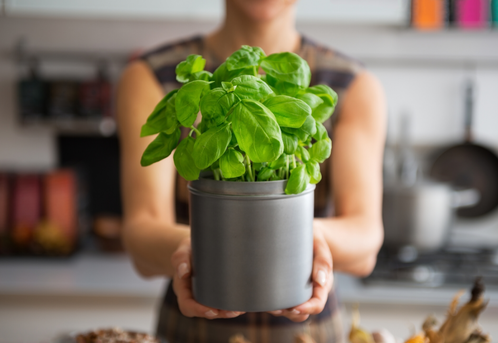 HOW TO GROW BASIL FROM SEED Basil is a pretty simple plant to grow from seed once you have the technique down. The great thing about growing from seed is that you have so many more choices of varieties to grow than your local garden center will offer as transplants. If this feels like a fun project you'd want to try, here's how you do it:
 A NOTE ABOUT HARDENING OFF SEEDLINGS Gardeners call the process of preparing baby seedlings for life outside, "hardening off". I have to admit that this is my least favorite job of starting seeds, but it pays off. When your seedlings live inside they are living a pampered life and will suffer and even die if they are exposed to strong sunlight and wind all of a sudden. So, take your baby seedlings outdoors in the late afternoon for a few days and let them experience the setting sun for a few hours, then bring them inside. After that, if the nighttime lows are above 50 you can leave them outside overnight. Once they have spent the night outside, you can expose them to a few hours of morning sun before you place them in a shady spot for the heat of the day. In about a week you'll have seedlings that are ready for full-time life outside. CAUTION: I've done some serious damage to my seedlings when I've rushed this process, so be patient and take it slow while hardening off your plants. What if growing seeds isn't for you or you want to plant basil plants now? No problem! Most garden centers are selling basil transplants (aka basil seedlings) that are ready to be planted right into your garden or a container right now. While you won't have as many options as you do when you buy basil seed packets, you do get the instant gratification of getting a plant in the ground right away. I'd suggest buying transplants and starting seeds at the same time! Then you can enjoy your basil plant while the seeds are germinating and growing up. 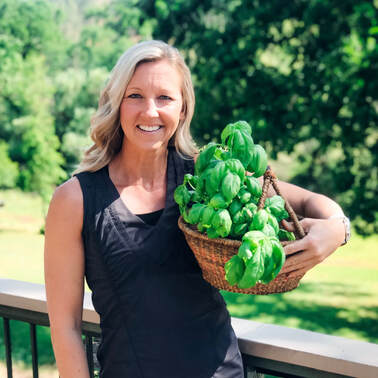 ONGOING CARE FOR BASIL Soil: Basil likes moist, fertile soil.
Water: Basil is not drought tolerant. Hardiness Zones: Basil is an annual, so it grows from late spring until it is killed by the first frost. For me this is October or November. Days to Maturity: 68 Days (This means the number of days from when you seed your basil to when it is likely to begin flowering.) HOW TO HARVEST A happy basil plant can get BIG, sometimes up to 2' around. It's a sight to behold. You can begin some light-harvesting of your basil plants once they have become pretty established, around 8-12" tall. Harvest your basil leaves early in the morning, if you can, when its cooler out. This will ensure you won't have wilted leaves. If you start to see flower buds begin to form, you'll want to do a full harvest which means cutting the entire plant to 4-6" above the ground. This harsh cutting will encourage the plant to flush out a second growth of leaves. 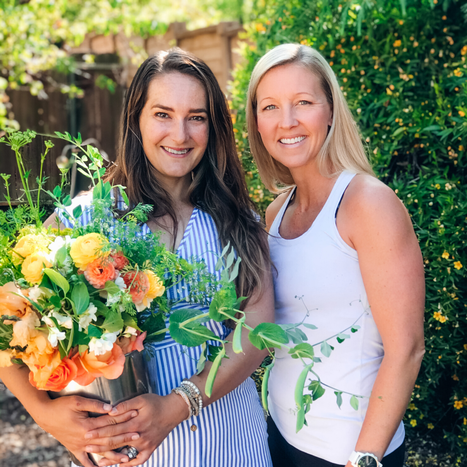
BASIL FOR CUT FLOWER ARRANGEMENTS If you don't know me, you must know that I have an undying passion for growing cut flowers and creating arrangements. I grow massive amounts of basil every year because I love to cook with it, but it is also an excellent foliage plant in a flower arrangement. If you want to try using your basil for flower arrangements, you'll want to harvest when stems feel pretty firm or as soon as flower buds begin to form. Like I said above, harvesting in the cool of the morning is best for basil, whether you want to eat it or arrange with it because the leaves are prone to wilting in the heat once cut. Take a vase full of cool water with you and place your stems directly into water to rest a few hours before arranging. Basil has a pretty good vase life. You can count on stems lasting around 7-10 days. I've even had it last long enough to start growing roots, which you can put in a pot with soil and keep well watered to propagate another basil plant. Cool, huh? If you choose to let your basil flower for arrangements or just as a flowering bush in the garden, just know that this may shorten it's life span a bit, but to me to worth it. Plus pollinators LOVE basil flowers. 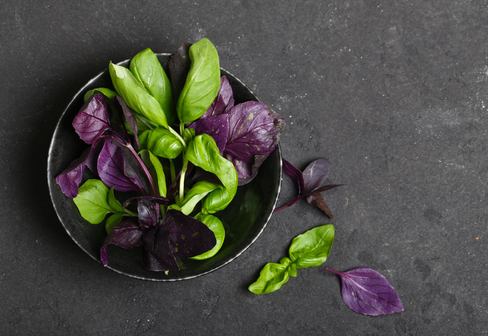 VARIETIES I LOVE Genovese: Probably the most well-known basil variety for cooking and making pesto. It has large luxurious leaves and an intense basil flavor. Mrs. Burns Lemon: Newer to me, but I'm loving it so far. It has a clean, citrusy scent mixed with the hints of basil. I'm excited to make basil with this variety since I prefer a lemony pesto more than any other style. She's got bright green leaves and white flowers that are gorgeous in arrangements. An arrangement with Mrs. Burns Lemon fills that room with that aromatic lemony scent; a perfect Summer through Fall bouquet option. Sweet Thai: If you love to cook Thai food, try this one! This plant is known for it's intensely spicy, anise/clove flavor that is a perfect complement to Thai and sweet dishes. Sweet Thai basil has medium green leaves and beautiful purple stems and blooms, making it a great edible landscape choice. Dark Opal: A purple-leaved basil that looks almost black that has clove-like scented leaves. I love this one for iced teas, cocktail garnishes, and arrangements. Well, have I convinced you to give growing basil a try? Tell me how you like to use basil in your home? Is there a certain variety that you are most excited to try? 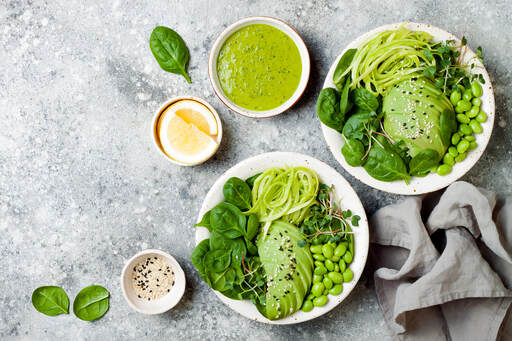 Tiana's Favorite Basil RecipeFresh herbs are a fantastic addition to many dishes, but I especially love them for dressings, marinades and dips.
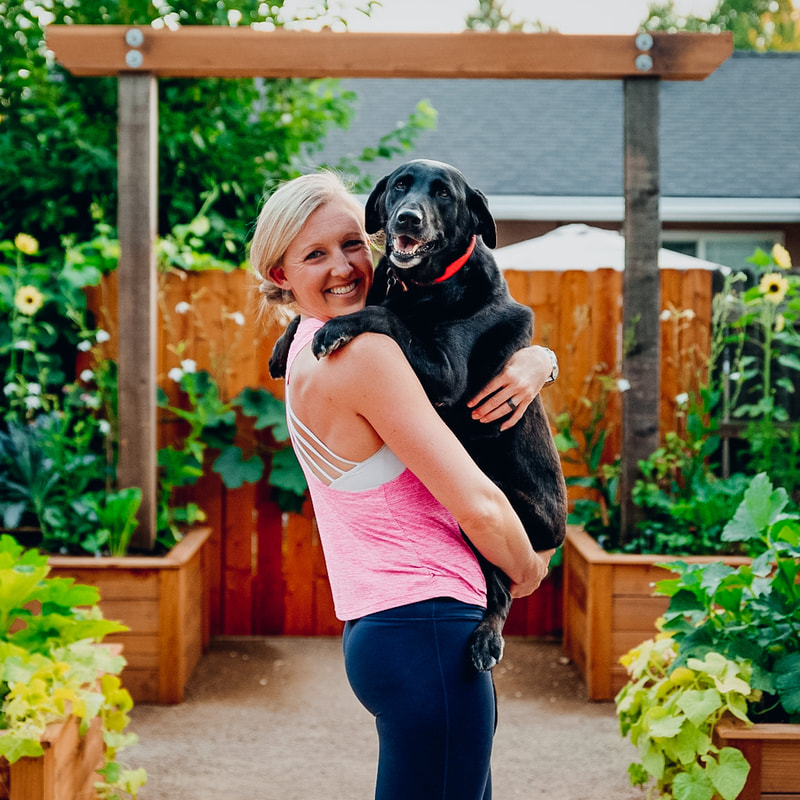
One of my favorite recipes comes from Beth Manos Brickey, FNTP of Tasty Yummies. FIVE-MINUTE GREEN GODDESS DRESSING Ingredients -1 avocado -1 cup packed fresh basil -1/2 cup packed fresh parsley -1/4 cup organic olive oil -1/4 cup water (or more as needed) -3 tbsp avocado based mayonnaise -1 large clove of garlic -2 tbsp fresh lemon juice -1 tbsp apple cider vinegar -1/2 tsp sea salt -black pepper to taste -1 jalapeño, ribs and seeds removed, optional Instructions 1. Add all ingredients to a high speed blender or small food processor. Pulse a few times, then blend until well incorporated and super creamy. Add more water as needed to reach your desired consistency. This can be served as a salad dressing, dip, sauce or spread! Get creative with it!  As an adult, it has always been a fantasy of mine to see if I can live completely off my land for a year. I realize the likelihood of being able to do this completely without relying on outside commercialism is low. However, I can certainly be doing SO MUCH BETTER than I am right now. My husband and I currently live on 1/8th of an acre. Our dogs basically own the backyard, and since they are young and full of insane amounts of energy, we have mostly left that space open for them to run around. Right now, we have 1 peach tree, 2 concord grape vines and 1 rosemary bush that will never die. Outside of that, we purchase all of our other fruits and vegetables from local farmers. Fortunately for us, we are surrounded by farms, but this has also made me complacent in my efforts to grow some of my own food, which was fine until a few weeks ago when COVID hit. Like so many others, I tried to limit my trips to my local co-op to 1x per week. Which has been fine since the majority of the vegetables I purchase from there last a really long time. Since the co-op purchases the majority of their produce from local farms, the time from harvest to my kitchen is very short. This expands the lifespan of that vegetable (and the nutrient density of that vegetable!). So I quickly found that almost everything we eat regularly lasted an entire week. Everything except lettuce. And boy do we eat A LOT of lettuce. So much that I would swing by the co-op every other day for more! But that all recently came to a halt. And it made me realize that this is the perfect time to start growing my own fresh lettuces!  Luckily, my good friend is also a garden consultant and she has a deep-rooted love for helping people grow their own food from home. So I’ve had her over to my house for a consultation and I’m eager to get started being more self-sufficient with my efforts to grow my own food. What I have found is that many of us are feeling this same pull to self-sufficiency. So rather than keeping all of this amazing information to myself, I have asked my garden consultant friend, Sara, to come onto my blog and share some of her favorite tips for growing your own food from home. She will focus on delicate foods that don’t last in the fridge for very long but that are also very easy to grow. We plan to talk about herbs, lettuce, and even edible flowers! At the end of each blog, I’ll share one of my favorite recipes or tips to help you take your food from the garden to your table. Before Sara joins us, however, I wanted to share with you 3 reasons why, even after this pandemic is over, we should still prioritize getting our green finger polished! 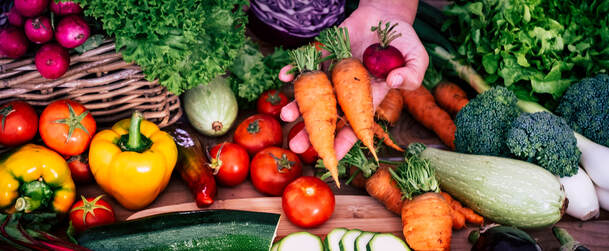
Did you know that approximately 20% of fresh vegetables in the US come from overseas? That “fresh” vegetable traveled thousands of miles likely for several days to get to you. How fresh can that really be? Every single day that a vegetable is away from its native plant and native soil, it is no longer being fed. Instead, it is using up store nutrients to keep itself alive. That means less nutrients are available for you when you actually get around to eating it. It is estimated that vegetables today have up to 40% less nutrients than their counterparts from just one century ago. Beyond the distance traveled for these commercial grown fruits and vegetables, many of the commercial crops have been genetically modified and/or grown to prioritize yield instead of quality. This means more fruit/vegetables are available from the same plant/soil, but that also means each fruit/vegetable has less nutrients available inside of it. If reaching optimal health is a goal, we need to prioritize nutrient rich foods! When you grow your own food, you make this possible by using soil rich in nutrients, natural fertilizers, and growing practices that don’t deplete your soil and plants. Win win! 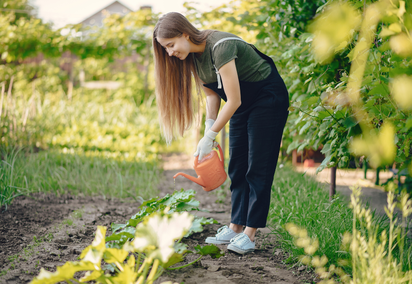 2. NO RECALLS! Remember that spinach recall in 2019? I don’t know about you, but when I buy fresh produce, I fully believe I’m doing good things for my body. I certainly don’t expect to get E. coli, salmonella, or listeria because I’m eating well! And guess what? It is estimated that just 2% of the produce imported from overseas is inspected. 2%!!! No wonder we have issues with recalls. When you grow your own food, YOU control the environment. That means that you can use clean water and safe fertilizers to ensure your plants are getting all the nutrients they need without worrying about getting sick from them!  3. IT CAN SAVE YOU MONEY!
Depending on the food you love to eat, certain foods have been shown to be much cheaper to grow at home than to purchase. Those include:
If you notice, these plants continue to provide harvest throughout the growing season which means they save you money in the end. Single yield plants, such as radishes, carrots, garlic and onions, all yield one vegetable per seed, so you only get 1 harvest. They can be fun to grow, and the taste can certainly go well beyond something you would get in the grocery store. Plus, don’t forget what I said in #1 and #2 above! But if we’re talking strictly about money, they may cost you more to grow than to buy. So if saving money is a priority for you, look to get these single yield vegetables from a farmers market instead. These are just 3 reasons to start gardening but there are so many. Including spending more time outdoors (hello, Vitamin D!) and stress relief (which we can ALL use more of these days!) I am so excited to have Sara on the blog so I truly hope you come back to check out all of her tips so that you can continue to take the steps necessary to get closer to optimal health! My hope is that you can be inspired by this stay-at-home order to grow and homemake more of your own food. So, let me know what else you want to grow at home! Let’s use this as an opportunity to be more self-sufficient AND create new habits that can support our health for years! |
AuthorTiana Rockwell is a certified nutritional therapist, avid endurance athlete and dark chocolate lover. She believes that by eating REAL food, we can balance our body and reach optimal health and wellness! Archives
May 2022
Categories
All
|
 RSS Feed